Transforming Your Home While Avoiding DIY Interior Painting Mistakes
A fresh coat of paint can completely transform the look and feel of your home. However, a simple painting project can quickly turn into a frustrating experience if common mistakes are made, such as skipping primer or not applying at least two coats of paint. From uneven coverage to paint drips, many homeowners find themselves dealing with avoidable mishaps, which often lead to the search for how to fix a bad paint job on walls.
At Gonnella Painting, we believe that preparation and technique are key to achieving a flawless finish. In this blog, we’ll cover the 10 most common interior painting mistakes and how to avoid them, ensuring your project looks professional from start to finish. We’ll guide you through techniques to prevent uneven wall paint and roller marks, and address the frustration of paint peeling.
Key Takeaways: Preparation is Key to a Flawless Finish
| Mistake Category | Consequence | Professional Fix & Avoidance |
| Preparation | Paint won’t adhere, leading to peeling and cracking paint on drywall. | Focus on interior wall prep before painting (cleaning, sanding, priming). |
| Product Choice | Poor coverage, fast fading, and difficulty cleaning. | Invest in high‑quality interior paint vs cheap paint and the right paint finish. |
| Application | Streaky paint finish after the second coat, paint drips on trim, baseboards, and ceiling. | Use high-quality brushes and rollers and avoid overloading the paintbrush or roller. |
| Conditions | Slow paint to dry, poor paint adhesion. | Maintain ideal temperature and humidity for interior painting. |
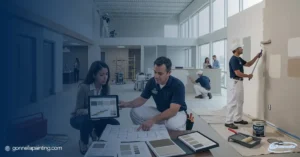
| Expertise | Costly rework to fix complex painting mistakes. | When to hire professional interior painters to ensure a long‑lasting interior paint job with a professional finish. |
1. Common Painting Mistakes to Avoid: Errors in Preparation
One of the biggest mistakes homeowners make is diving straight into painting without proper preparation to fix common painting mistakes. Walls need to be cleaned, holes and cracks patched, and surfaces primed. Without this crucial step, paint may not adhere properly, leading to paint peeling and uneven coverage. This poor foundation is the root of many DIY interior painting mistakes homeowners make.
1.1. Skipping the Prep Work: Interior Wall Prep Before Painting
Walls must be immaculate. Failing to sand or clean walls properly leaves behind dust and residue that prevents good paint adhesion.
- How to avoid common painting mistakes: Always clean your walls with a damp cloth or mild detergent. Patch any imperfections using spackle and sand smooth. Apply a high-quality primer before painting to ensure the new paint lasts longer. This is especially important for fixing peeling and cracking paint on drywall.
1.2. Not Using the Best Primer for Previously Painted Walls
Skipping primer is one of the biggest errors homeowners make, as it can lead to issues like paint bleeding underneath. Without it, paint won’t properly stick to drywall, leading to peeling paint and uneven finishes. This is a painting mistake that impacts the final finish and durability.
- How to fix paint issues: A high-quality primer for previously painted walls creates a smooth surface for the paint to adhere to, helping to fix paint issues and avoid costly interior repairs when you apply at least two coats of paint.
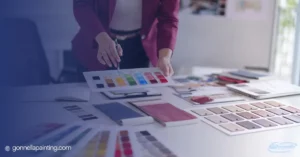
2. Choosing the Wrong Products: Paint Sheen and Quality
Not all paints are created equal, and choosing the right paint color and paint finish can make a significant difference in the final result. Choosing the wrong finish often highlights imperfections, resulting in disappointment and costly rework.
2.1. Choosing the Wrong Paint Finish: Wrong Paint Sheen for High-Traffic Rooms
A glossy finish may highlight imperfections, while a flat finish can be challenging to clean. Using the wrong type of paint can result in disappointment and costly rework. This is one of the most common painting mistakes to avoid.
- How to avoid it: Consider the room’s purpose. Use satin or eggshell for living rooms and bedrooms. Use semi-gloss for kitchens and bathrooms to ensure the paint is durable and easier to clean, given the high-traffic nature of these areas. Use high-gloss for trim and doors.
2.2. Ignoring the Importance of High-Quality Interior Paint vs Cheap Paint
Bargain paint may seem like a good deal, but it often requires more coats and lacks durability. Cheap paints can also result in uneven finishes and faster fading, leading to the need for touch-up work and more paint to dry.
- How to avoid it: Invest in high-quality paint brands known for coverage, longevity, and easy application to ensure the new paint lasts longer. Visit the paint counter and ask about premium lines.
2.3. Using Low-Quality Brushes and Rollers
Using cheap brushes and rollers can lead to streaks, uneven application, and visible brush marks, which are common painting mistakes. Low-quality bristles often fall out and get stuck in the new paint.
- How to avoid it: Purchase high-quality brushes and rollers for a smooth, professional finish. We recommend using synthetic brushes for water-based paints and natural bristle brushes for oil-based paints. Ensure you have the right roller or brush for the job.
3. Application Errors: Technique, Drips, and Roller Marks Fix
Even with the best prep, poor technique can lead to a streaky paint finish after the second coat or excessive paint drips. Learning how to correctly use your painting tools is essential.
3.1. Overloading the Paintbrush or Roller: Controlling the Amount of Paint
Dipping a brush or roller too deeply into the paint can lead to excess drips and an uneven application, resulting in visible dried paint on the wall or the dreaded paint drips on trim, baseboards, and ceiling. This common painting mistake is a result of using too much paint.
- How to avoid it: Lightly dip the brush about a third of the way into the paint and roll off excess paint on a paint tray before applying the paint to ensure a smooth finish. Work in small sections to avoid overworking the paint once it starts to dry.
3.2. Not Using Painter’s Tape Correctly and Causing Paint Peeling
Painter’s tape is essential for clean edges, but if applied incorrectly, it can result in paint bleeding or paint peeling when removed, which are common painting mistakes.
- How to avoid it: Apply painters’ tape evenly and remove it at a 45-degree angle while the paint is still slightly wet to avoid common painting mistakes. Ensure you protect your floors and furniture with drop cloths before starting.
3.3. Rushing the Drying Process: Applying the Next Coat Too Soon
Many homeowners get impatient and apply a second coat too soon, resulting in streaks and peeling paint. If the underlying coat hasn’t had time to dry completely, the new coat can pull it up.
- How to avoid it: Follow the paint manufacturer’s recommended drying time before applying the next coat. Allow the first coat to dry completely to ensure the paint has time to dry effectively, reducing the need for an uneven wall paint and roller marks fix.
4. Environmental and Post-Job Mistakes
4.1. Painting in the Wrong Conditions: Ideal Temperature and Humidity
High humidity, extreme temperatures (outside the 50°F to 85°F range), and poor ventilation can affect paint adhesion and drying time. This is a factor of failing to consider the environment.
- How to avoid it: Paint in temperatures between 50°F and 85°F with good airflow for best results and to allow the paint to dry effectively. If considering safe spray painting, indoor ventilation, and safety are non-negotiable.
4.2. Neglecting the Ceiling and Choosing the Wrong Paint Color
Ceilings often go unnoticed, but a freshly painted ceiling in a complementary paint color can brighten up a space and complete the look. Failing to consider different lighting conditions can also ruin the visual effect.
- How to avoid it: Use a flat or matte finish to reduce glare and ensure a clean, even application. Consider the light and test paint samples on a small section of the wall before committing to an entire room. You can also take a sample to a professional to match it precisely.
4.3. Forgetting to Clean Up Properly: Wasting Paint and Tools
Leaving brushes, rollers, and paint cans open can lead to hardened tools and wasted paint.
- How to avoid it: Clean brushes and rollers immediately after use with soap and water (for water-based paint) or mineral spirits (for oil-based paint). Seal leftover paint properly to prevent drying and ensure you have enough paint for future touch-ups.
Some Questions for How to Fix Common Painting Mistakes
Q: What happens if I skip interior wall prep before painting?
A: Skipping prep work is one of the main causes of peeling and cracking paint on drywall. Without cleaning, sanding, and applying the best primer for previously painted walls, the new paint will not properly bond. This often leads to a quick and costly need for an uneven wall paint and roller marks fix.
Q: What is the biggest issue when using cheap paint?
A: Cheap paint often requires more coats for adequate coverage, meaning you actually use a larger amount of paint overall. Critically, it lacks the durability and resin content of high-quality interior paint, leading to faster fading and a streaky paint finish after the second coat.
Q: How much does it cost to fix DIY painting mistakes like streaking or drips?
A: The cost to fix DIY painting mistakes can range from a few hundred dollars for minor touch-ups and repairs to over a thousand for a full repaint. Fixing problems like severe paint drips on trim, baseboards, and ceiling usually involves sanding, patching, and applying a new coat, which requires an experienced interior painting contractor near me.
Q: How can a pro painter help you avoid finish mistakes?
A: A professional painter knows how paint finish, paint adhesion, and surface prep work impact results. For cabinet painting or residential painting, using the wrong paint type can cause chipping. Painting experts rely on paint samples, proper tools like brushes or sprayers, and experience to deliver a long‑lasting interior paint job with a professional finish.
Q: What is the ideal temperature and humidity for interior painting?
A: The ideal temperature and humidity for interior painting is generally between 50°F and 85°F with humidity levels below 50%. High humidity slows down the rate at which the paint dries, increasing the risk of drips, running, and poor paint adhesion.
Trust the Experts for a Flawless, Long-Lasting Finish
While DIY painting can be rewarding, it often leads to common interior painting mistakes homeowners make that affect the final look and durability of their project, especially under different lighting conditions. We understand that dealing with uneven wall paint and roller marks is frustrating.
At Gonnella Painting, we bring expertise, precision, and high-quality materials to every residential painting project, ensuring your home looks stunning without the hassle. Trust our team to handle the details, from precise interior wall prep before painting to achieving that seamless professional finish.
Are you tired of dealing with a streaky paint finish after the second coat? Avoid the headache and get a free interior painting estimate today! We are your local house painters for whole home repaint and can provide reliable professional cabinet painting and refinishing services.